FIREWALL FORWARD & Wiring - Page 60.
October 18, 2004: After being away for a
week on business, I finally get a little bit of time this evening to get some things done
on the airplane project. I picked up my mail this morning. In the mail was a
box from Van's with the primer solenoid and associated plumbing, plus an oil sump heater
kit. I also bought some other hardware and electrical connectors from Van's as part
of that order.
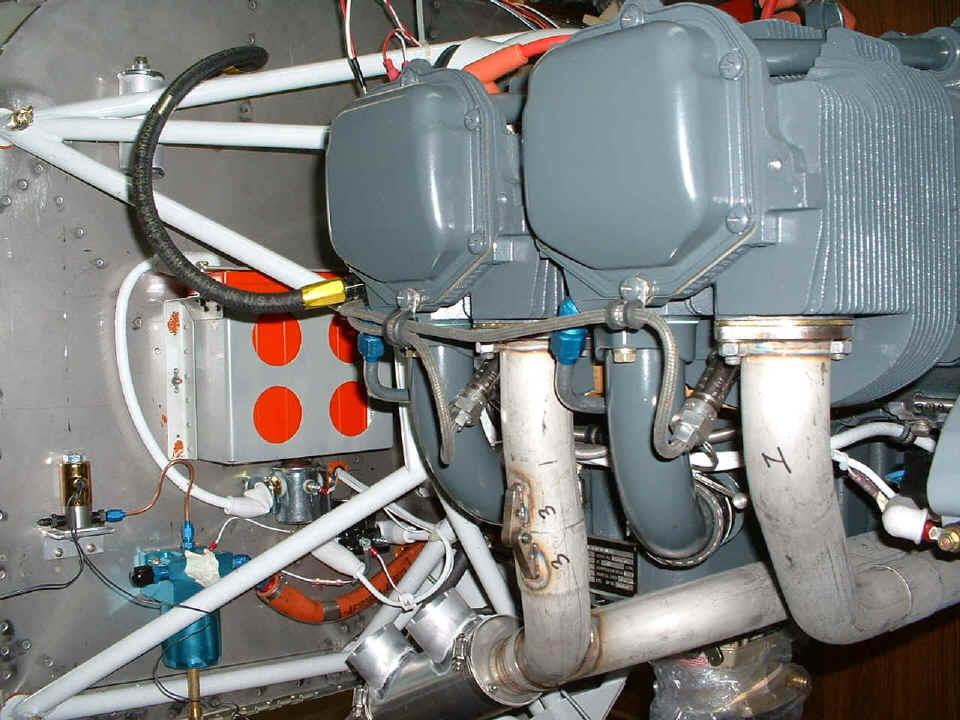
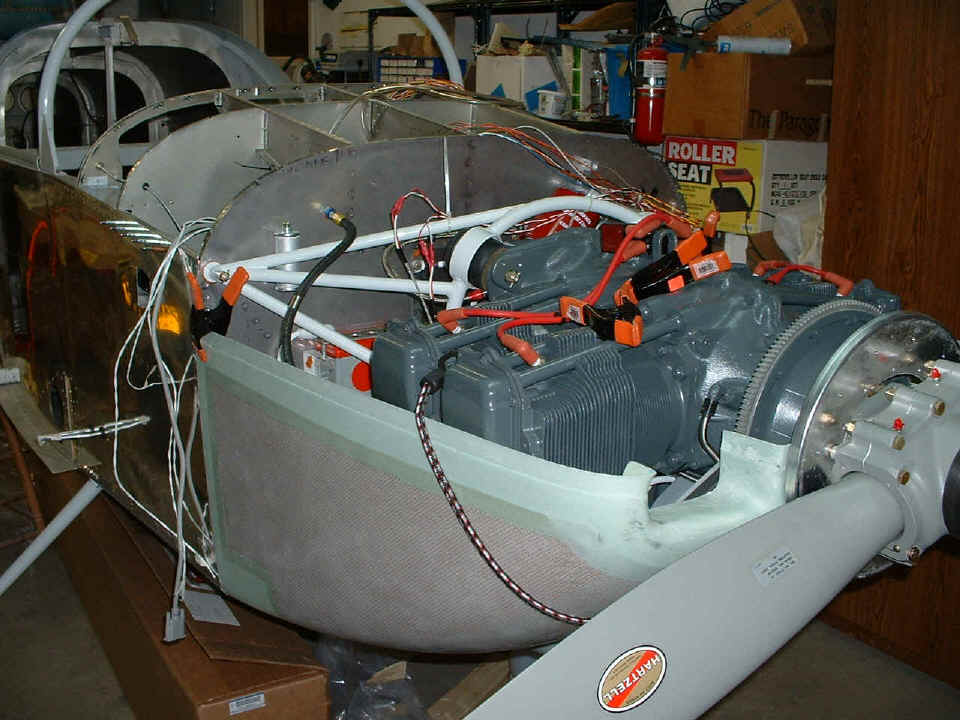
What's new here? The spark plug wires on the lower plugs are now clamped to
the valve covers on both sides of the engine. I fabricated a mounting angle for the
primer solenoid valve above and left of the blue gascolator. I cut a short length of
1/8" copper tubing and installed AN-fittings on each end to connect the gascolator to
the valve. I have more parts and tubing to connect to the intake manifold ports on
cylinders 1, 2, and 4. You can see the "gold" fitting with black hose
attached to that same port on cylinder number 3 to monitor manifold pressure.
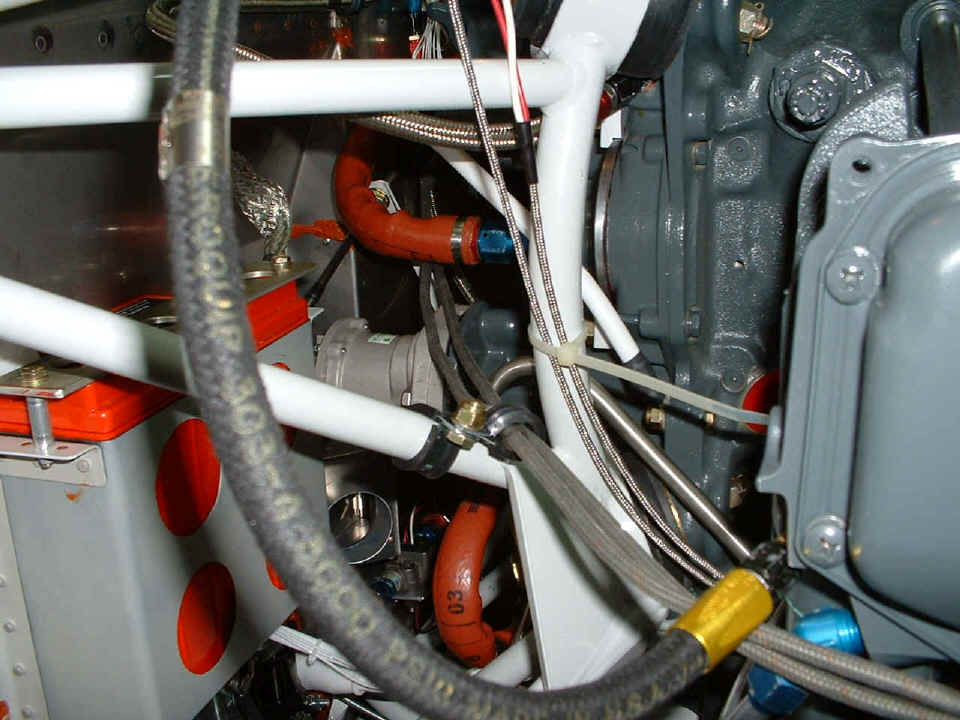
As for other things in the past two days, I bought some additional clamps to
secure the spark plug wires as they cross the engine mount enroute to the cylinders on
each side of the engine. I found those clamps at Lowe's. And if you look above
the prop governor in the center of the photo below, a new RED fire-sleeve-covered hose
with a BLUE AN-fitting is temporarily installed on the oil pump fitting that goes over to
the oil cooler (yet to be installed). David Edgemon had a custom hose made for this
particular line. I will wait until I see how the other end of this hose connects to
the oil cooler radiator before making that decision.
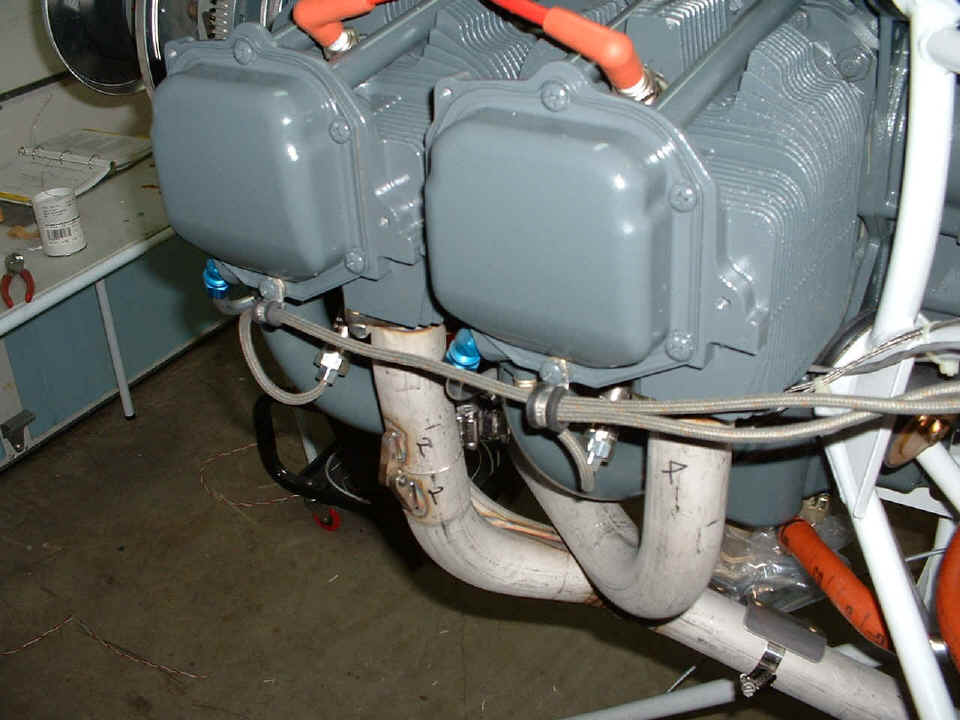
And here are the gray shielded lower spark plug wires from the magneto on the
other side of the engine clamped to the valve covers to minimize vibration wear, etc.
The RED spark plug wires on the top of the cylinders come from the solid-state
ignition coils.
And other things to report today: Van's Aircraft
mailed me my two original copies of the "Bill of Sale" to begin the aircraft
registration process! And I had a phone call tonight with David Edgemon about his
latest flights in his RV-9A. He talks about the need to change the jets in his
carburetor to keep the aft cylinders from running too lean. The carburetors on these
engines are built for Cessna 172's. They don't develop the same amount of manifold
pressure as the RV's that run about 60 MPH faster on that same 160 HP engine.
The total construction time on the airplane stands at
1,269 hours. With the additional hours of prep work of building the work
table, jigs, flap/aileron construction box, and putting up shop lights in the garage, the
total project time is 1,338 hours.
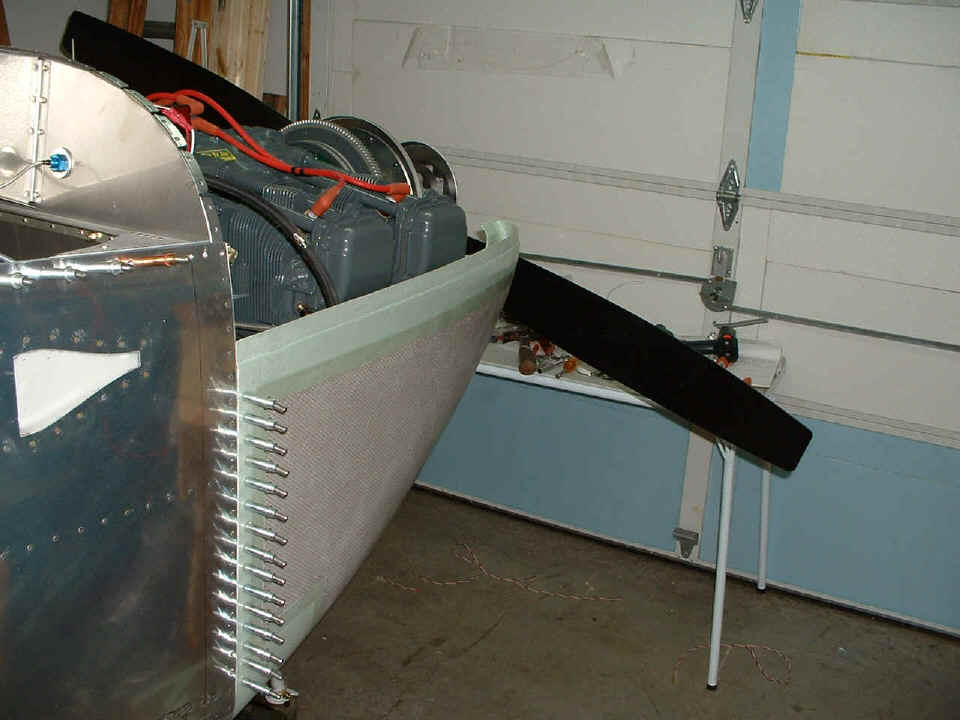
October 20, 2004: Finally! Another MILESTONE DAY has come at last! I got the cowling trimmed to
size and slotted for the nose gear leg and put it in place to drill it to the hinge mounts
on each side. This is the first cut I made to notch the bottom for the nose gear
leg. I tried the first fit and realized I had to do something to get the exhaust
pipes up closer to the fuselage and closer to each other. Before I mounted the cowl,
I made a list of all the parts that needed to be removed and primed in my next
primer session.
The next thing I did was to grind off just a bit of the steel mounting ear
bolted on at the rear of the alternator to give just a bit more room when installing the
drive belt. I wanted to be sure that I had enough clearance between the alternator
and the cowling to be able to tighten the belt without rubbing the cowl. And then it
was time to put the thing in place and clamp it before drilling the first holes in the
cowl and the underlying retaining hinge. You can see that I used a bungee cord to
hold up the front of the lower cowl with a clamp at both top rear edges to hold the hinge
to the fiberglass cowl.
Next came the check of the lower edge before drilling the sides. Looks
good to me from here and from the inside, too!

This photo shows the clearance of the ring gear inside, and the 1/4-inch gap
from the spinner back plate to the front of the cowling.
Here is the RIGHT side fully drilled and clecoed together.